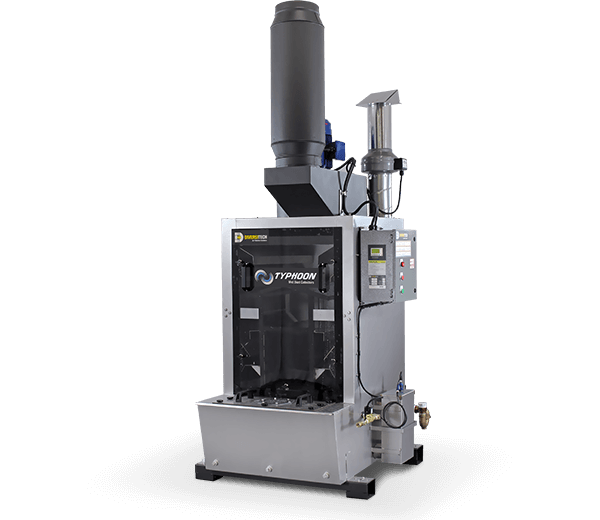
- undefined Model
- Motor: 15 HP / 575V/3/60Hz
- Filter Type: Mist Filter
- Product Number: WX-6500-150W5

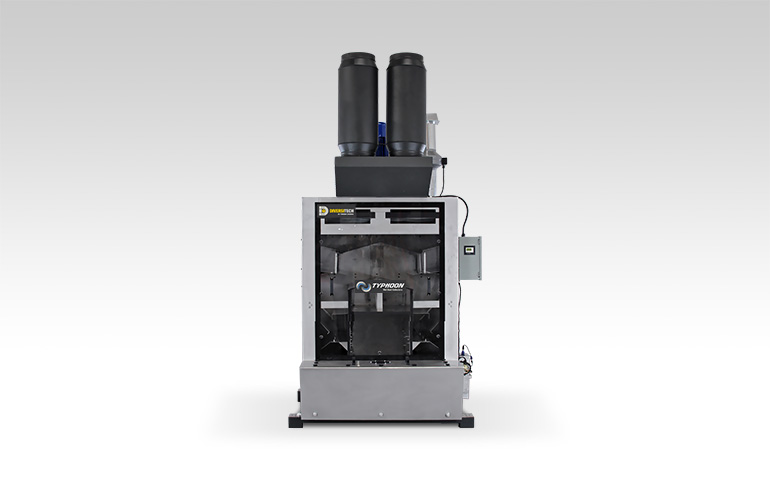
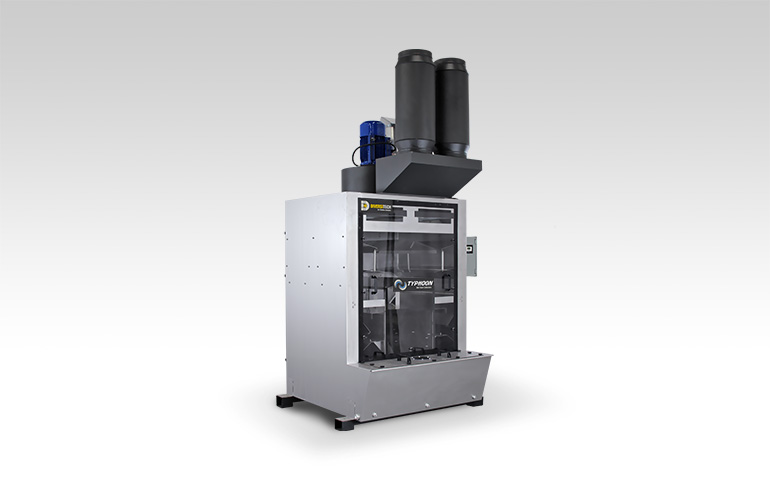
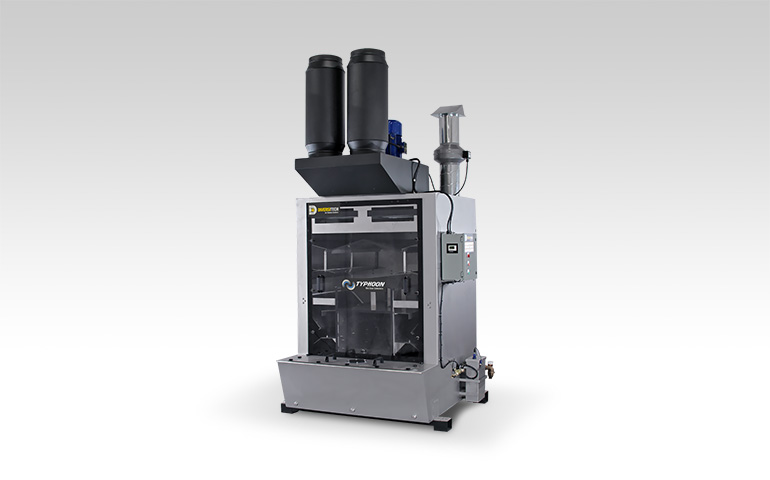
Safeguard your facility from the risk of fire and explosion with Diversitech’s Typhoon WX-6500 Wet Dust Collector. Perfect for the safe collection of combustible metal dust, the Typhoon WX-6500 can also be used in applications too demanding for cartridge style collectors.
The Typhoon WX-6500 uses a 15HP blower to draw in airborne contaminants and filter them through Diversitech’s proprietary “water-tree” baffle design. Once inside the collector, the particles bond with suspended water droplets where they then drain down to the bottom of the collector for safe removal. With the ability to capture airborne particulate as small as 3 micron at source, the Typhoon WX-6500 guarantees cleaner air for your industrial setting.
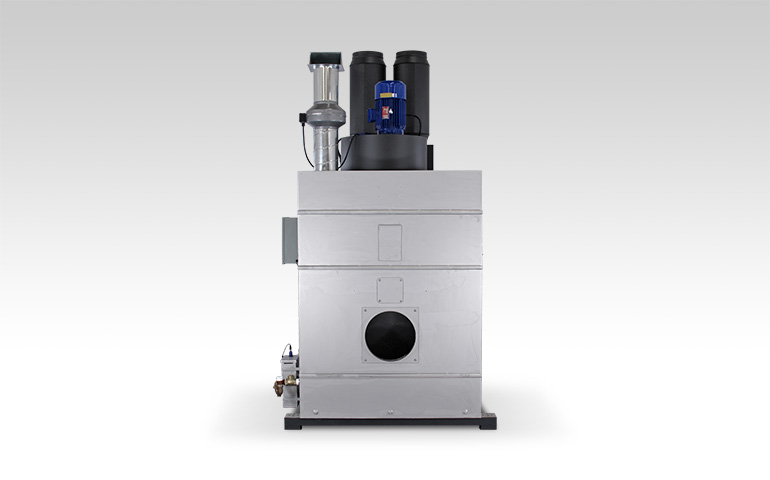
To reduce excess humidity in the surrounding air, the Typhoon WX-6500 comes equipped with a mist eliminator after-filter to prevent water vapor from leaving the exhaust. Diversitech’s highly efficient wet dust collectors provide a low maintenance, low cost alternative to traditional dust collectors as they don’t require expensive filter replacements. Many of our competitors offer collectors made with a tar or epoxy coated steel construction which is susceptible to rust and corrosion. Diversitech only manufactures stainless steel wet dust collectors, which guarantees that your equipment will provide years of dependable service.
Ideal applications and materials for the Typhoon WX 6500 include: grinding, deburring, sanding, aluminum, titanium, magnesium, zirconium, tantalum, beryllium, cadmium, and niobium.
*Please note that for the Typhoon WX series with the strainer kit option:
What makes the Typhoon line stand out? These are just a few key benefits that make Typhoon a clear choice:
Our machines are built to operate smoothly even when used in rugged, industrial environments. The Typhoon WX 6500 is engineered with the following construction and performance features:
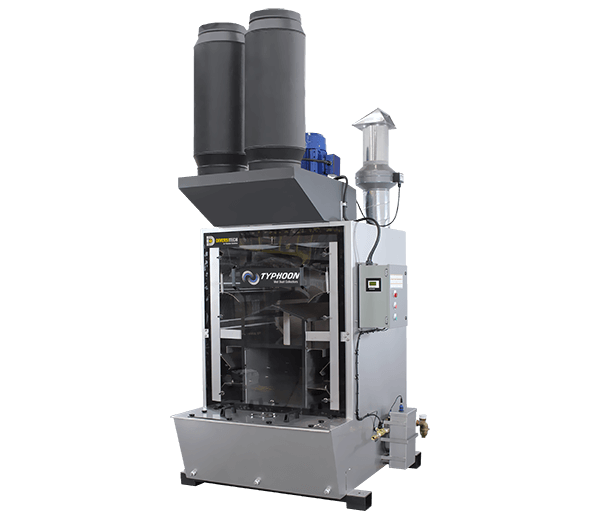
Our standard wet dust collectors can be enhanced with the following options to help meet your industrial air filtration needs:
The Typhoon WX-6500 Wet Dust Collector standard base model comes equipped with a 230V, 15.0 HP motor, but the following options and add-on kits are also available upon request:
| Model (Product Number) | Motor (H.P.) | Air Flow (CFM) | Volts/Phase/Hz | Amps | Net Weight1 | Width1 | Height1 | Length1 | Noise (dB) | Filter Type |
|---|---|---|---|---|---|---|---|---|---|---|
| WX-6500-150W2 | 15 | 6500 | 230V/3/60Hz | 34 | 537.51 | 67 | 129 | 67 | 80 | Mist Filter |
| WX-6500-150W4 | 15 | 6500 | 460V/3/60Hz | 16.9 | 537.51 | 67 | 129 | 67 | 80 | Mist Filter |
| WX-6500-150W5 | 15 | 6500 | 575V/3/60Hz | 14 | 537.51 | 67 | 129 | 67 | 80 | Mist Filter |
1 – Product weight and dimensions are based on base-models and may vary depending on selected product features. Please contact us for an accurate shipping quote.
Learn how to get the most out of your Typhoon WX-6500 Wet Dust Collector and troubleshoot common problems.
See our help topics and support videos below, and download the Typhoon WX-6500 Wet Dust Collector product guide and owner’s manual.
Designate a location for the unit near the operator that is sufficiently close to a grounded power source.
Before you use your unit, you’ll want to perform a function test to verify it’s in working order.
Confirm correct Voltage and Amperes.
Turn the power switch to “On” for a few seconds and check that the motor rotation is correct.
IMPORTANT: Look down the back of the motor and check that the motor fan turns in direction of arrow.
Listen closely to the motor and suction sound of the unit. Are they within the expected noise limits?
Place hand on top of the unit and feel for any unexpected vibration. Place your hand in front of the intake hood/surface to confirm the expected levels of suction.
Depending on application, your Typhoon Wet Dust Collector may require daily maintenance. When you see several inches of dust build up inside the wet collector water tank, remove the material as soon as possible.
Cleaning Instructions
Open the knobs or latches on the two front panels of the wet dust collector.
Inspect the mist eliminator filters inside the unit for holes or dust accumulation, replace the media if torn or dirty.
The filter frame must be replaced so that the cage side is facing upwards to prevent the media from being sucked out of the frame.
Inspect the HEPA after filters and replace if the filters are saturated.
Clean the inside of the unit completely from top to bottom, using wire brush or scraper and a pressure washer to remove all accumulated sludge and debris.
TIP: Remove the inlet duct to clean the inside of the back of the collector and inspect the inlet ductwork for dust accumulation.
Drain the dirty water using the optional WV-55 Sludge-Drain the dirty water using the optional WV Sludge Vacuum to separate the metal fines from the water, remove sludge on the bottom of the tank and skim the residual material floating on the water surfaceacuum to separate the metal fines from the water, remove sludge on the bottom of the tank and skim the residual material floating on the water surface.
IMPORTANT:
All debris must be stored in a ventilated metal drum to prevent hydrogen gas buildup.
If the collector has the optional strainer system, remove the basket and dump the accumulated dust, clean out the basket and replace it. (Refer to Appendix 5 in owner’s manual.)
Dust needs to be disposed of according to local regulations.
Ultra-Sound Cleaning
Remove the lid of the ultrasound sensor box.
Clean the sensor carefully removing any dust or debris.
Clean the dust and debris from the bottom of the sensor box.
Reset the Current Level (Ultrasonic Sensor)
View the video below for details instructions:
Adjusting Water Level
To properly adjust water levels, the motor must first be turned off:
Adjust stop SP to desired level.
Initiate the motor to adjust the running SP.
Confirm the correct voltage is being supplied into the panel.
If you’ve confirmed your voltage and the problem persists, contact Diversitech support for assistance.
If the operating level of your motor is too high or too low, try the following:
No data available.
Get an in-depth look at Typhoon WX-3000 Wet Dust Collector and explore its key features in action.
This video showcases how it works, its standout benefits, and why it’s the perfect choice for you. Watch now and experience the innovation firsthand!
Get an in-depth look at Typhoon WX-6500 Wet Dust Collector and explore its key features in action. This video showcases how it works, its standout benefits, and why it’s the perfect choice for you. Watch now and experience the innovation firsthand!
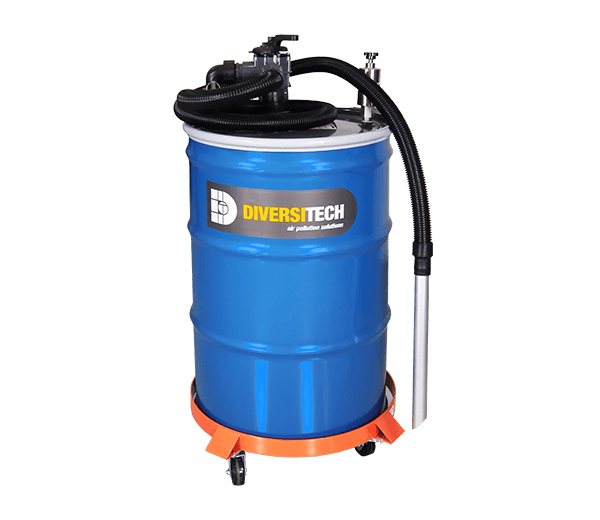
The WV Sludge Vacuum offers a fast, easy way to clean dust, chips and swarf out of wet dust collectors and other equipment.
40 gallon water capacity, stainless-steel wet dust collector with silencer.
80 gallon water capacity, stainless-steel wet dust collector with silencer.
Please provide the information requested below so we can provide you with a timely and customized solution for your specific needs.