WV Sludge Vacuum Help & Support
MENU ☰
Learn how to get the most out of your WV Sludge Vacuum.
See our help topics below, and download the WV Sludge Vacuum product guide and owner's manual.
How to..
Unpacking Unit
- Inspect carton for any possible damage during transit.
- Remove packing material.
- Do not tip or invert while handling.
- Locate item serial number, model and electrical ratings on the nameplate. Write down this information on the provided Maintenance Record found in your owner’s manual.
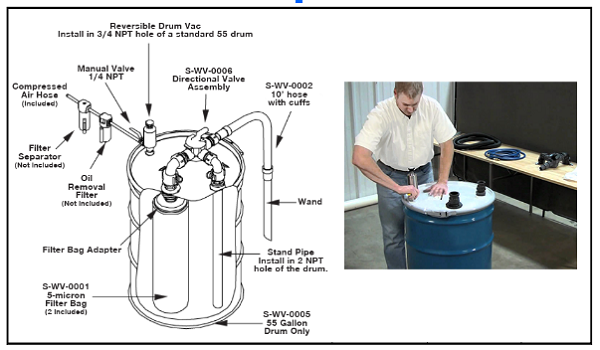
Installation
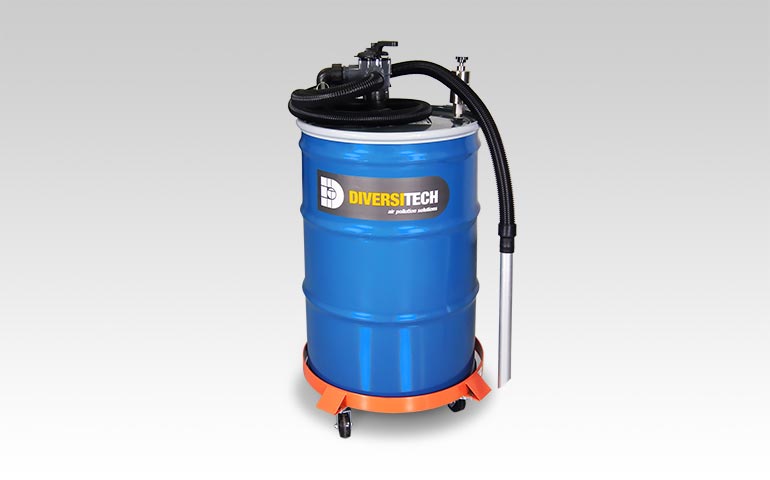
Please refer to the image below:
To replace the filter in your WV Sludge Vaccum, do the following:
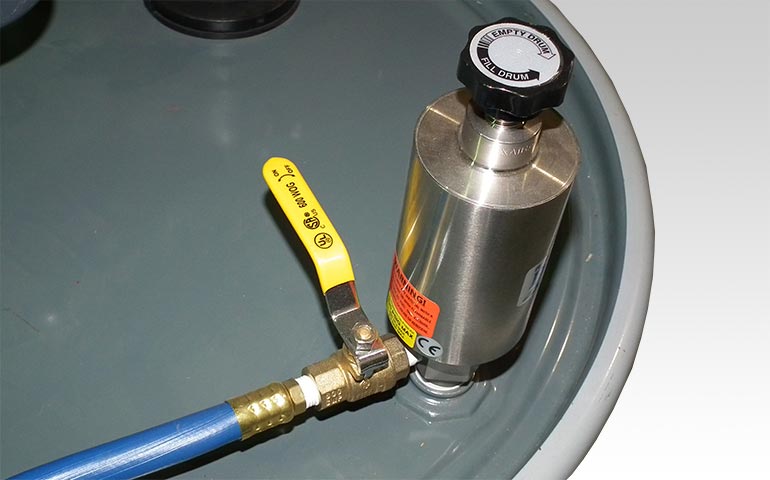
- Disconnect the compressed air supply.
- Unlatch and remove the locking ring from the drum lid.
- Slide the lid to the side which provides access to the filter bag.
- There is a wire ring in the top of the filter bag that seats on the filter bag holding assembly. To remove the filter bag, lift the bag up from the bag holding assembly and tilt it sideways.
- The ring can then be removed from the bag holding assembly (filter bag can be removed from the drum).
- A new bag can be installed by tilting the ring, and pushing it over the bag holding assembly. It will then easily seat itself and is ready for use.
Routine cleanings of your WV Sludge Vacuum will ensure optimal performance of your unit. To properly clean your WV Sludge Vacuum, do the following:
Cleaning The Pump Body
- Place the Reversible Sludge Vacuum into a mild cleaning or degreasing solvent. After cleaning is complete, verify the float can move freely.
- Use an air gun to remove any solution and contaminants. (Wear eye protection.)
Eliminating Clogs
If the Sludge Vacuum becomes clogged, disassemble it for cleaning:
- To remove the muffler assembly, use a wrench to hold the hex body firm while turning the cylindrical muffler assembly counter-clockwise with a strapping wrench.
- Once the muffler assembly is removed, use a pin-style spanner wrench to unscrew the threaded plug.
- Carefully remove the shim from the pump body and clean it using a mild cleaning or degreasing solvent.
- Clean the o-ring and threaded plug using a mild cleaning solvent. Clean the inside of the pump body to remove debris from the shim seat. Use an air gun to remove any solution and contaminants.
- Dry all components before reassembling.
- Reinstall the threaded plug.
- Do not over-tighten the threaded plug as it can damage the shim and restrict airflow.